
Getting started as a service provider
Welcome to Axle!
If you're a service provider, Axle helps you manage customer repairs, coordinate technicians, and keep estimates, invoices, and repair records together. This guide will help you get set up to complete your first customer repair — from creating the repair order to invoicing the customer.
➡️ This guide is for businesses that have an account on Axle platform, rather than responding to a one-off job link sent by a fleet — which is its own guide here.
The admin experience
Admins work in the "Admin" experience on Axle, where they can complete day-to-day flows for managing repair and maintenance for the fleet.

The tech experience
Technicians work in Axle's "Pocket Tech" platform, where they see their list of assigned repair orders, fill out repair orders with notes, parts, and labor lines, and submit to admins for review.

1) Sign in and get familiar with Axle
Sign in
First, make sure you're signed into Axle. Visit app.axlemobility.com and enter your email and password. You may be asked to enter a one-time verification code sent to your email.
If this is your first time signing in, you'll be asked to set your password. Once you do that, you're ready to start using Axle!
Get familiar with Axle
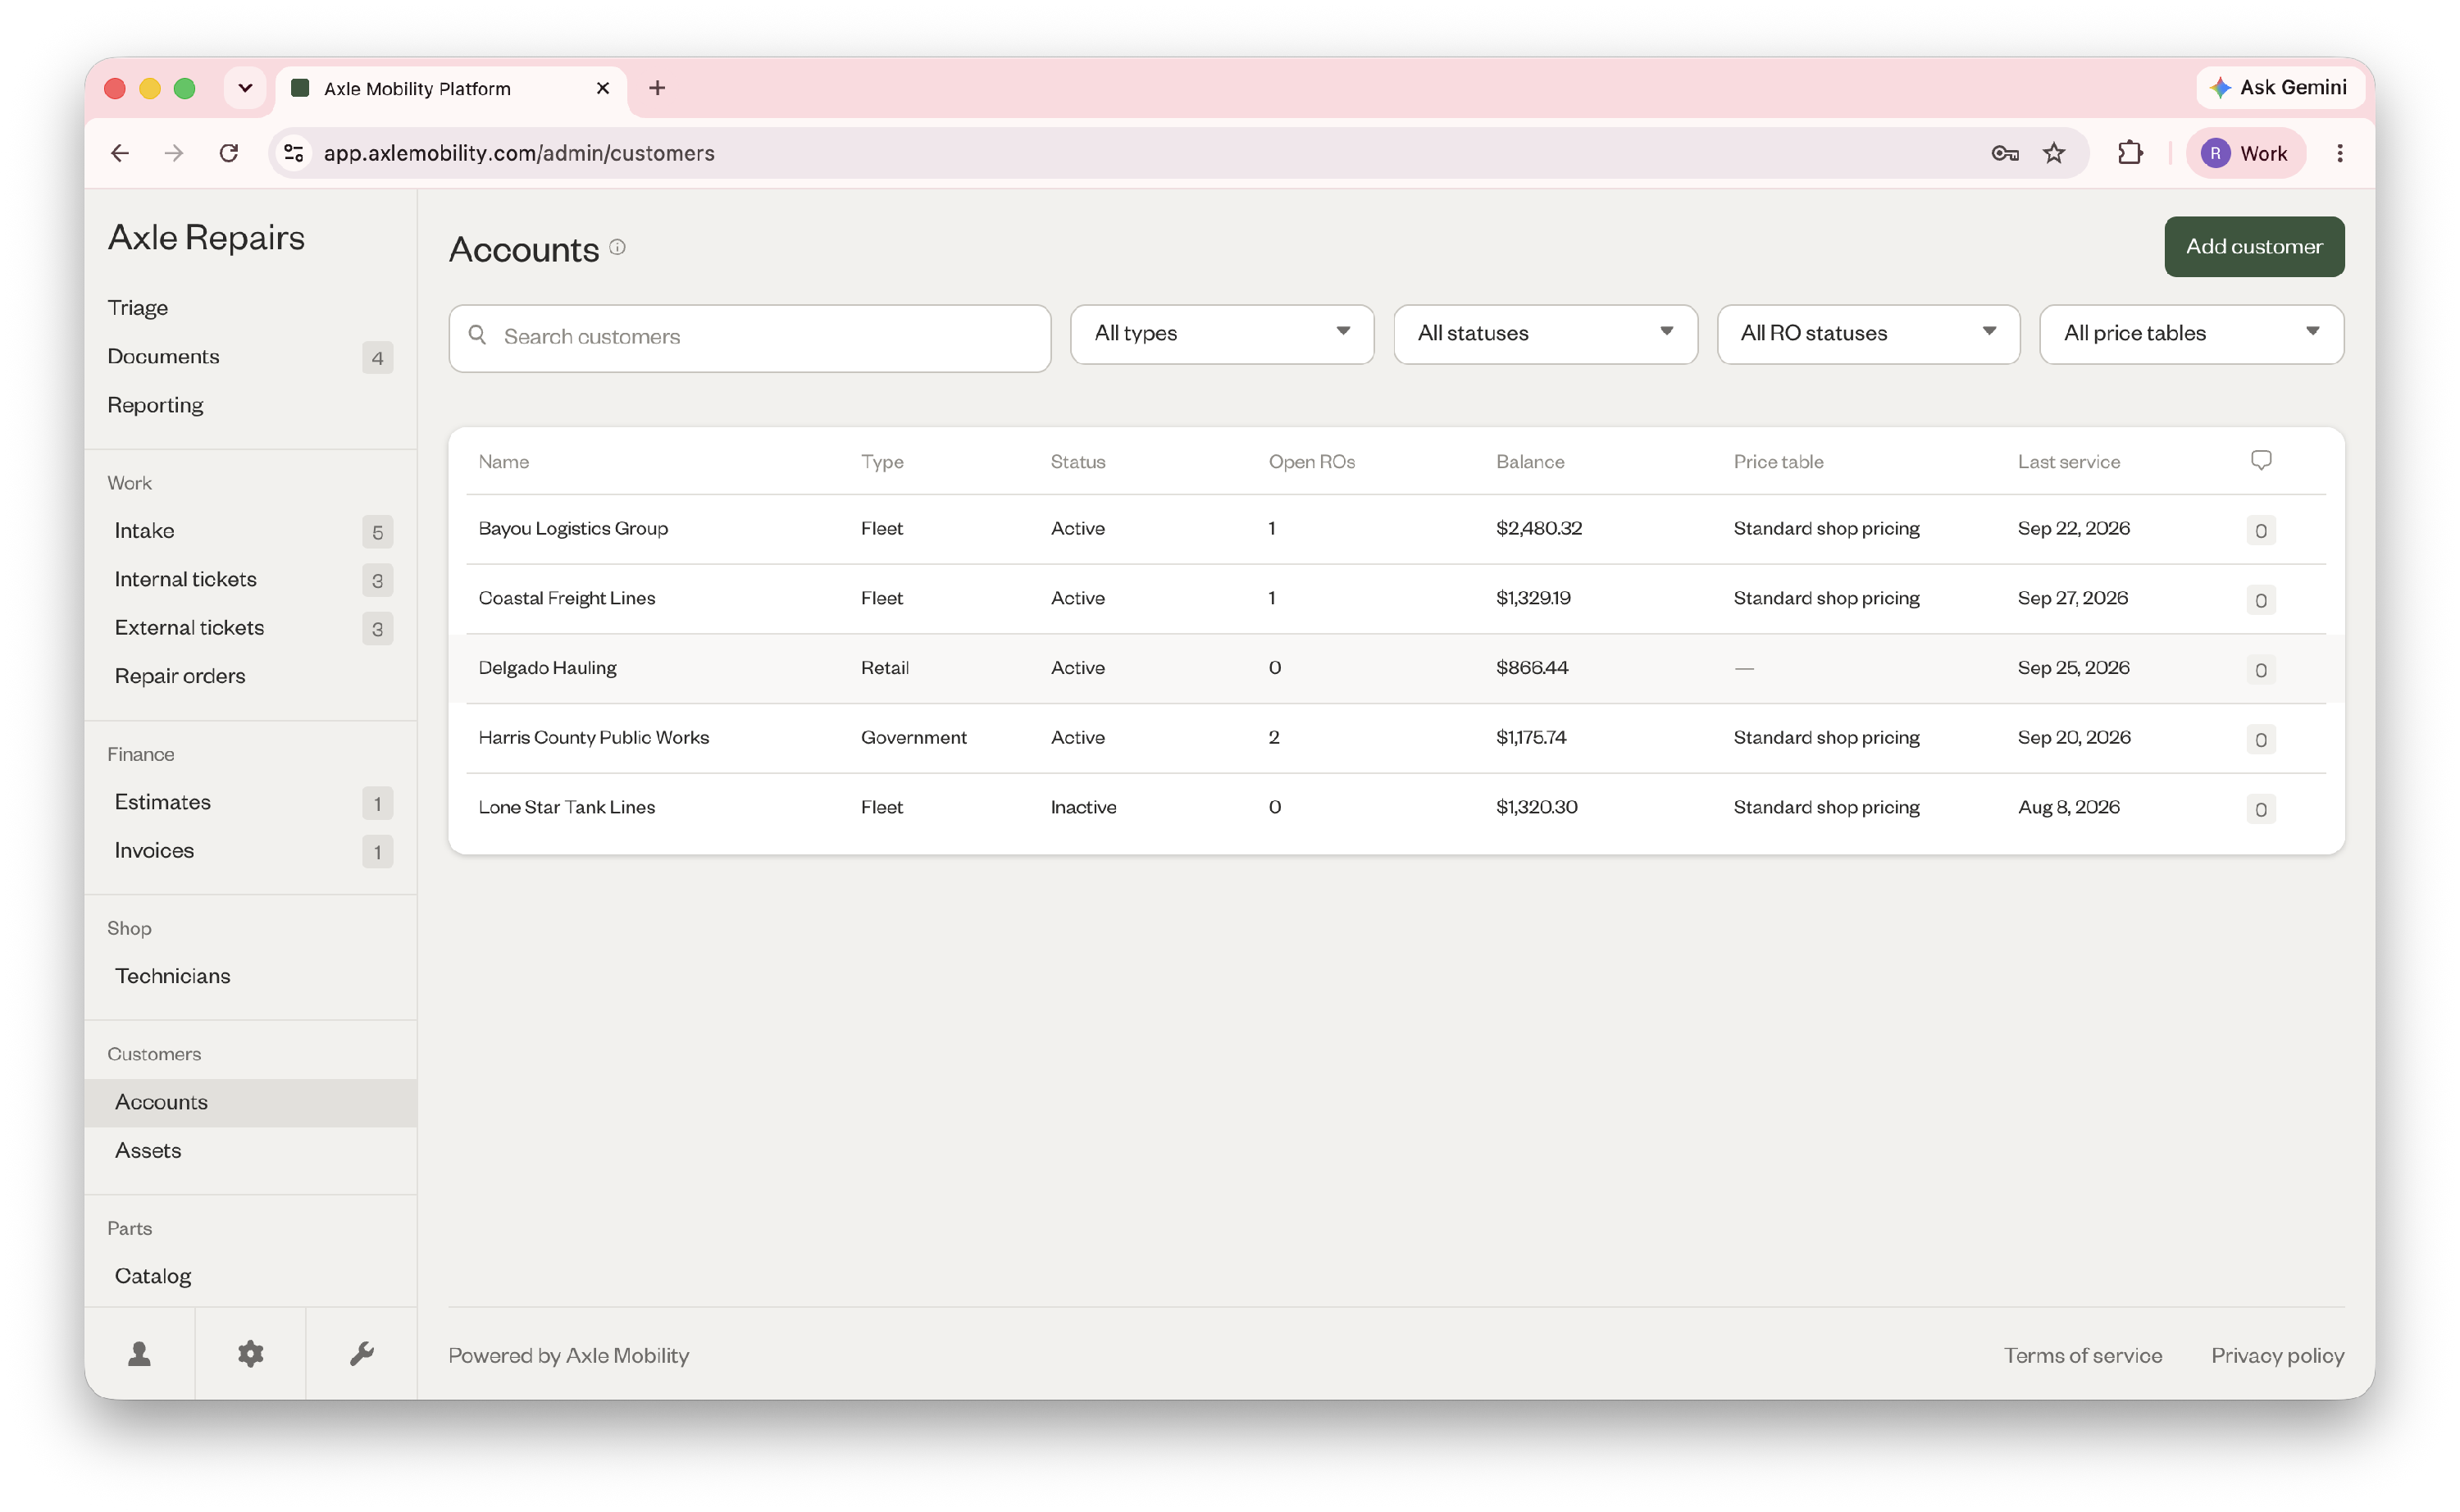
Go to Customers > Accounts to see the list of customers you service. Axle keeps each customer’s contact details, vehicles, billing settings, and service history in one place.
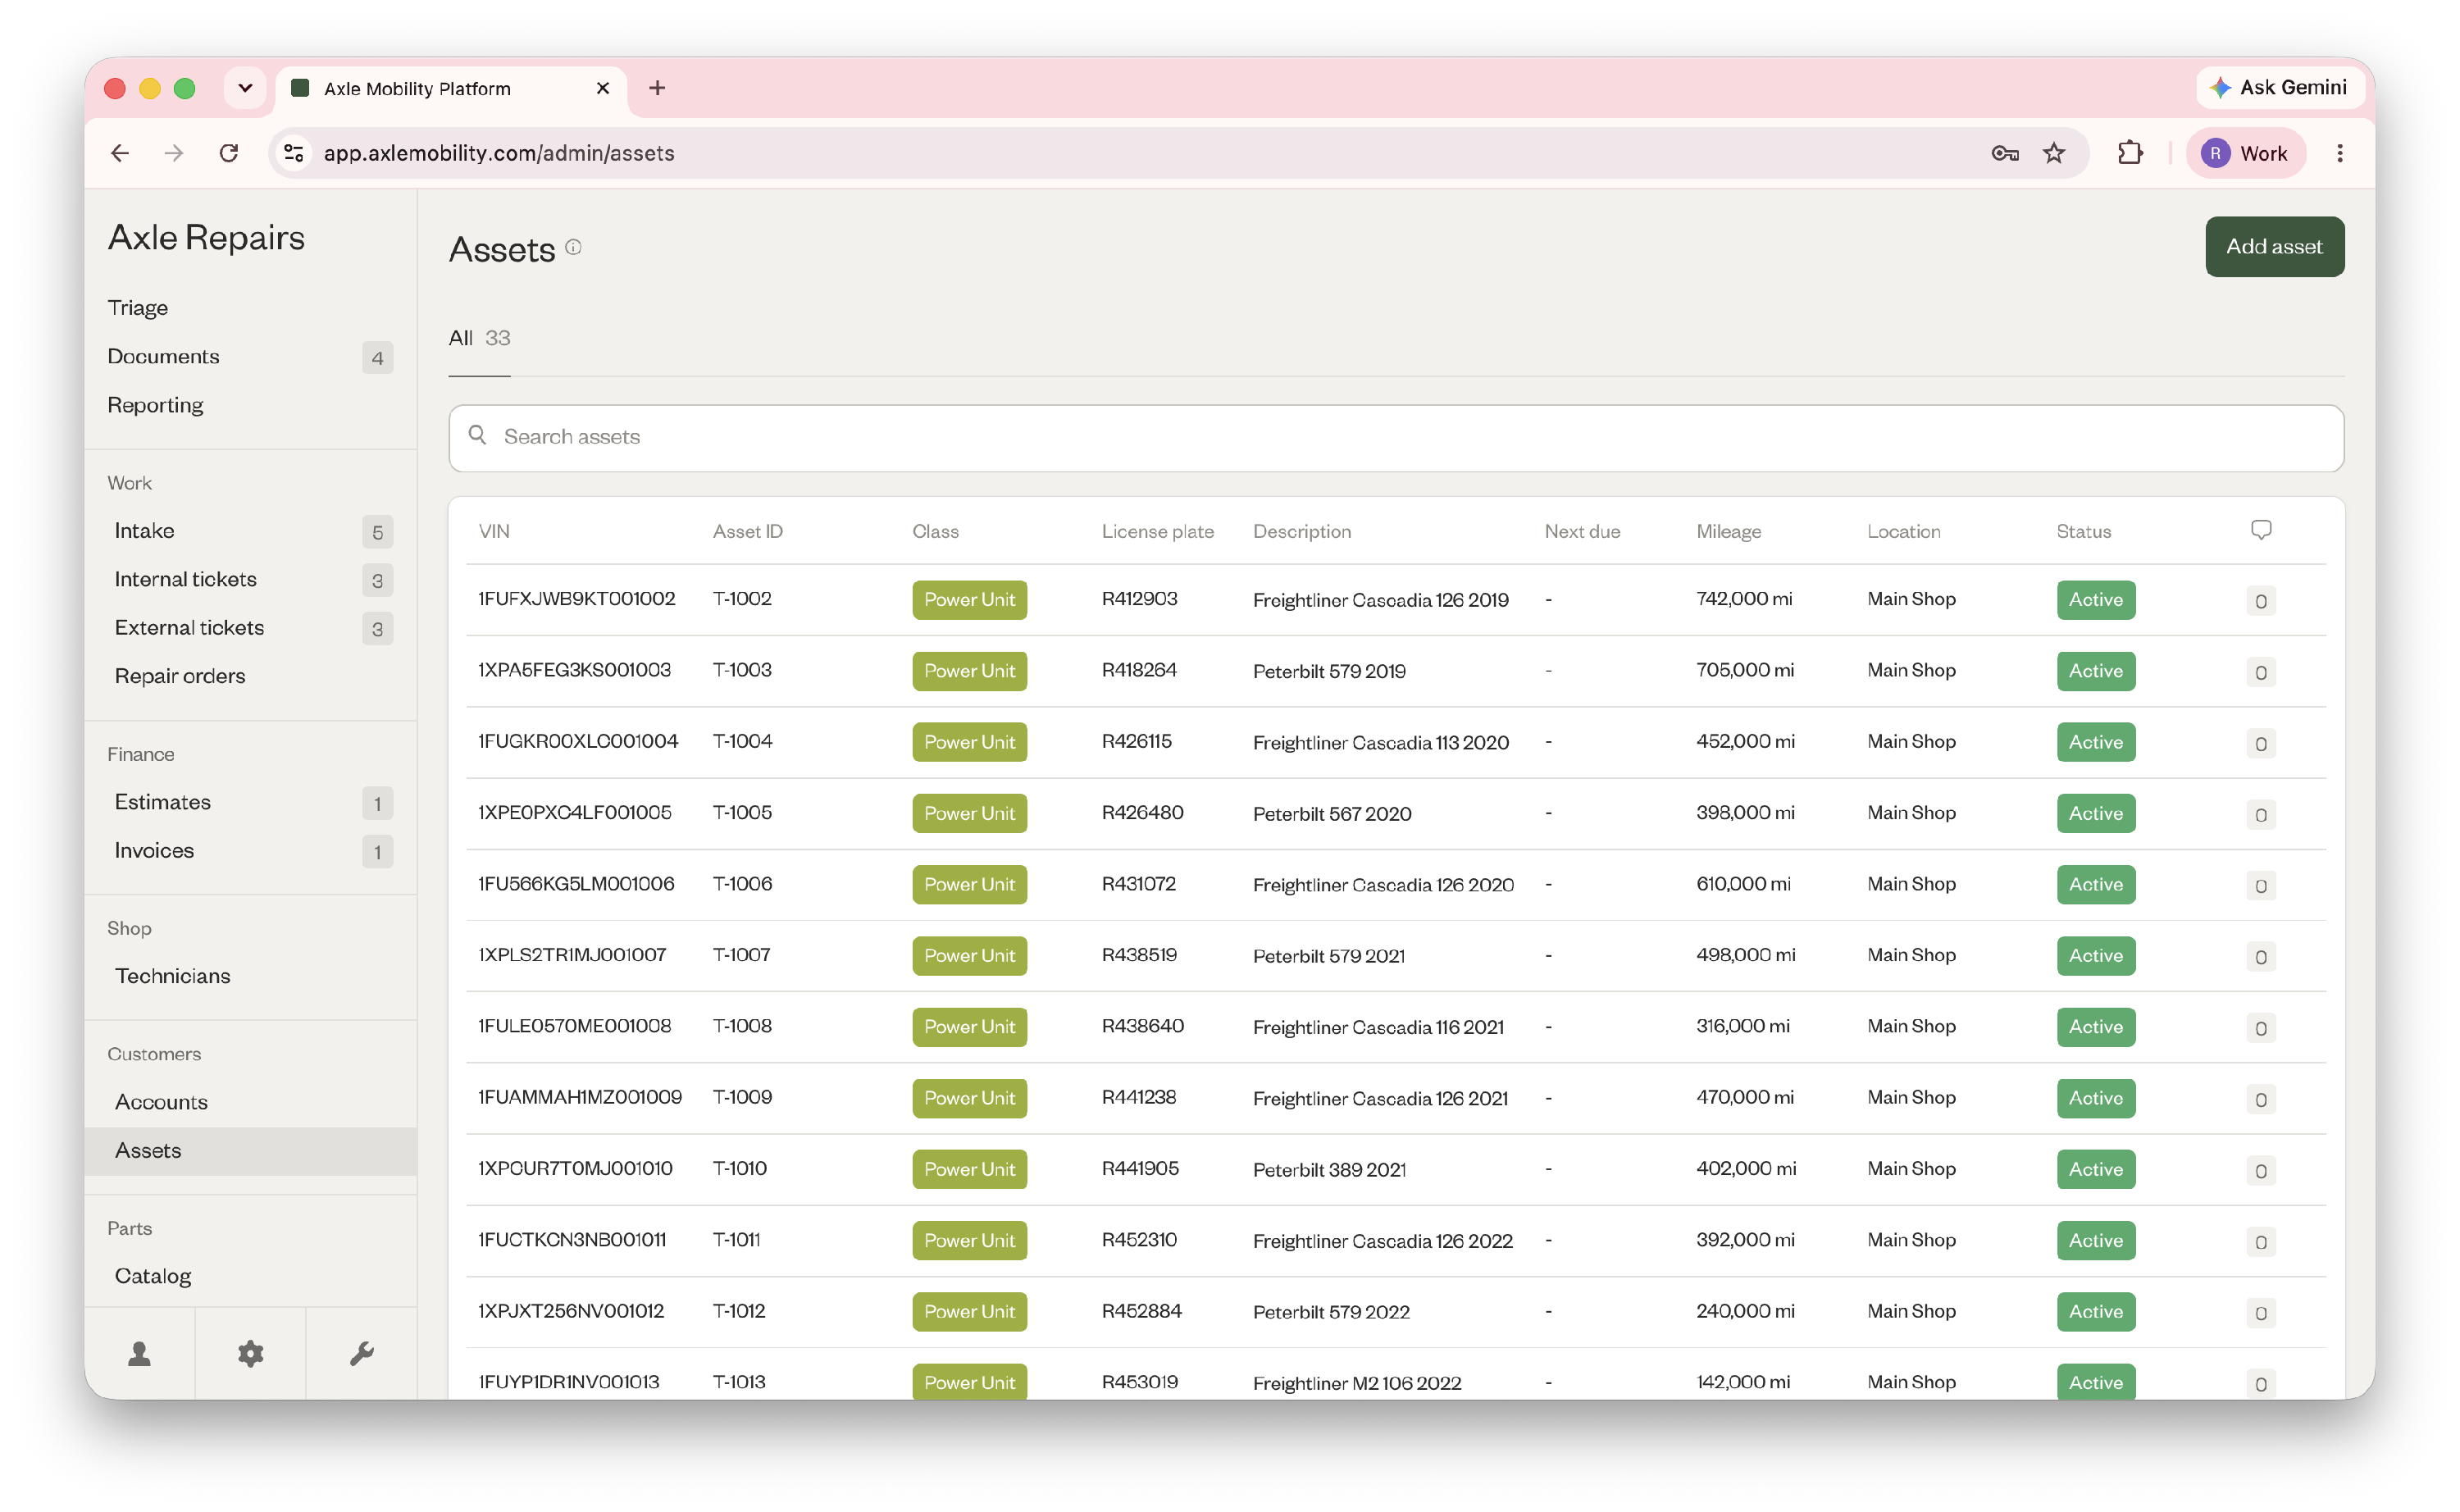
Go to Fleet > Assets to see your customers' assets. Here, you can add and manage the customer’s trucks and trailers, confirm which account they belong to, and review service history and open work for each asset.
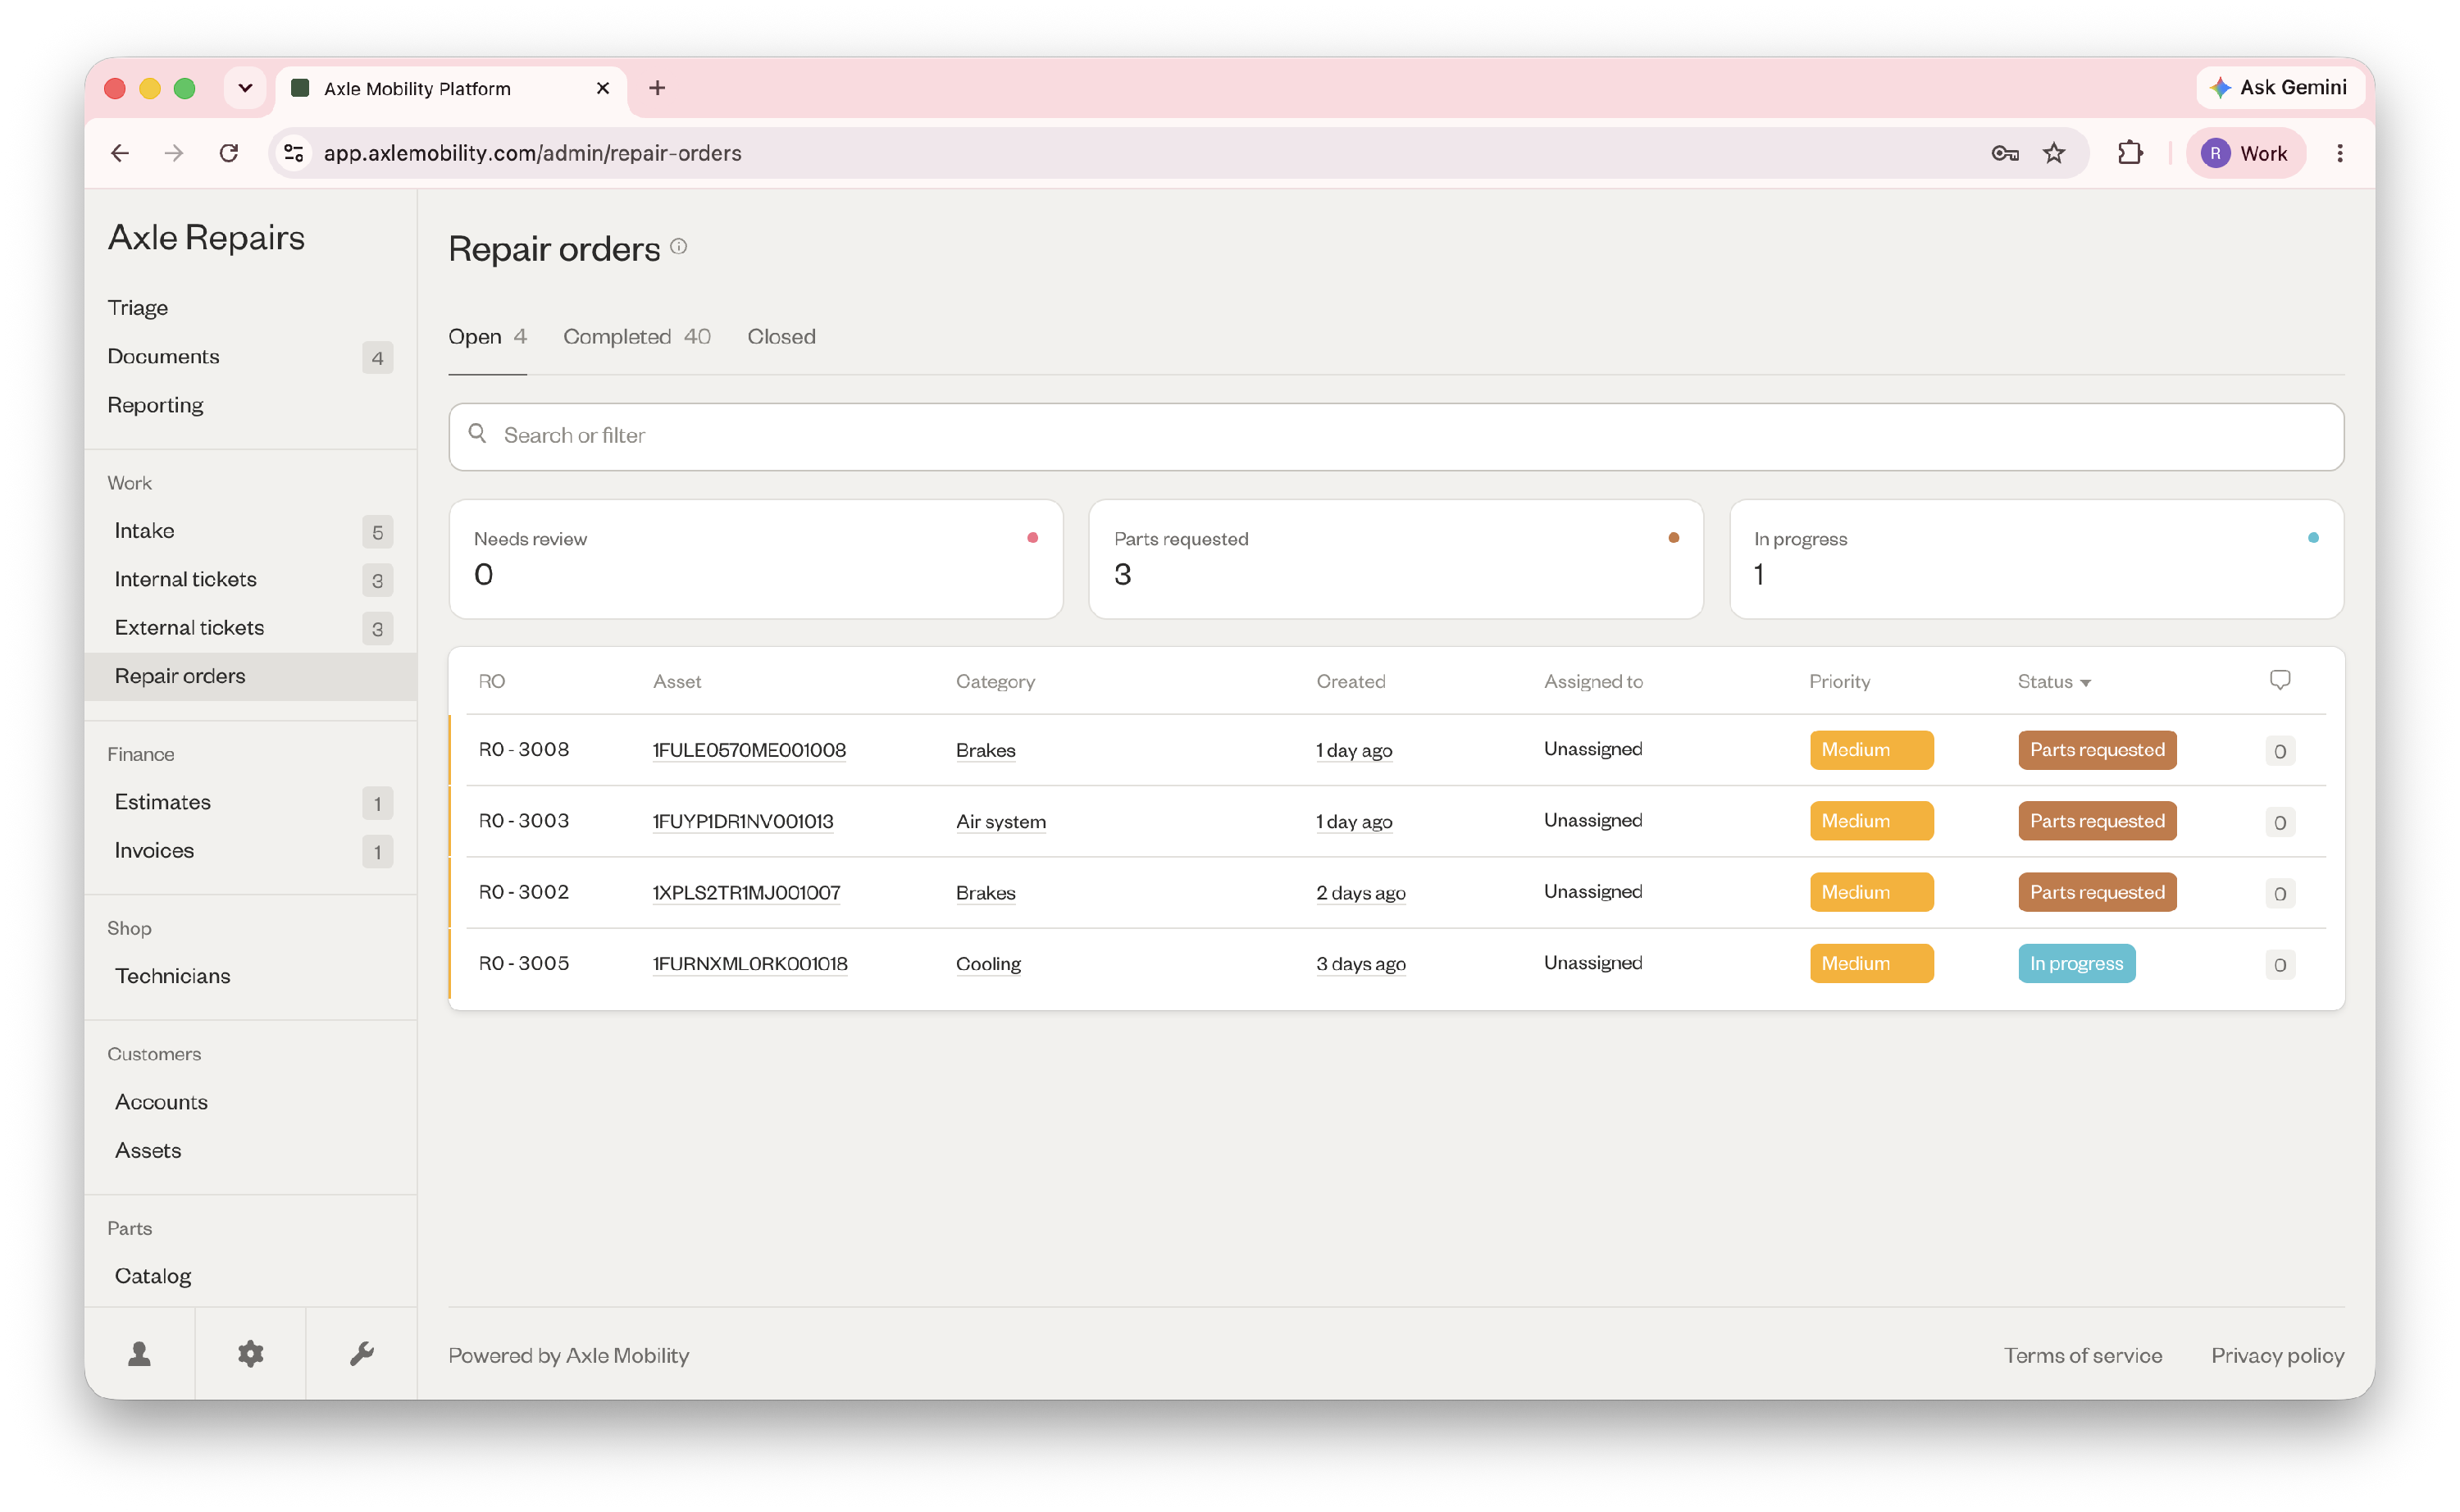
Go to Work > Repair orders to track all work happening in the shop. In this guide, we'll walk you through the full flow of completing a customer repair on Axle, from creating the repair order to invoicing the customer.
2) Set up your account
Before you work on your first customer repair, make sure your account is set up with at least one site, one technician, one customer, and one asset for that customer. You can use the demo data already in your account, or add your real data and use that — in which case, follow the steps below!
Add your first real site to Axle
- At the bottom of the sidebar, you'll see a gear icon.
- Click into Settings > Sites > "Add site" in the top right corner to add your first real site to Axle.
- You'll fill out the site name, street address, and optionally, assign members to your site.
Once you've added the site, go to the site selector at the top of the sidebar to switch into that site.
Add your first real technician to Axle
- Go to Fleet > Technicians > "Add technician" in the top right corner to add your first real technician to Axle.
- Fill out their first name, last name, email, and assign them to sites (including a default site).
- They'll get an email invite to create their account and start doing work on Axle!
If you prefer to add a technician later, feel free to skip this step and use yourself as a technician. All admins have access to Pocket Tech and can work on repair orders there, just like techs.
Add your first real customer to Axle
- Go to Customers > Accounts > "Add customer" in the top right corner to add your first real customer to Axle.
- Fill out their legal name, street address, and other optional info.
After you add them, they'll be in the "Information needed" section until you attach at least one asset to their record.
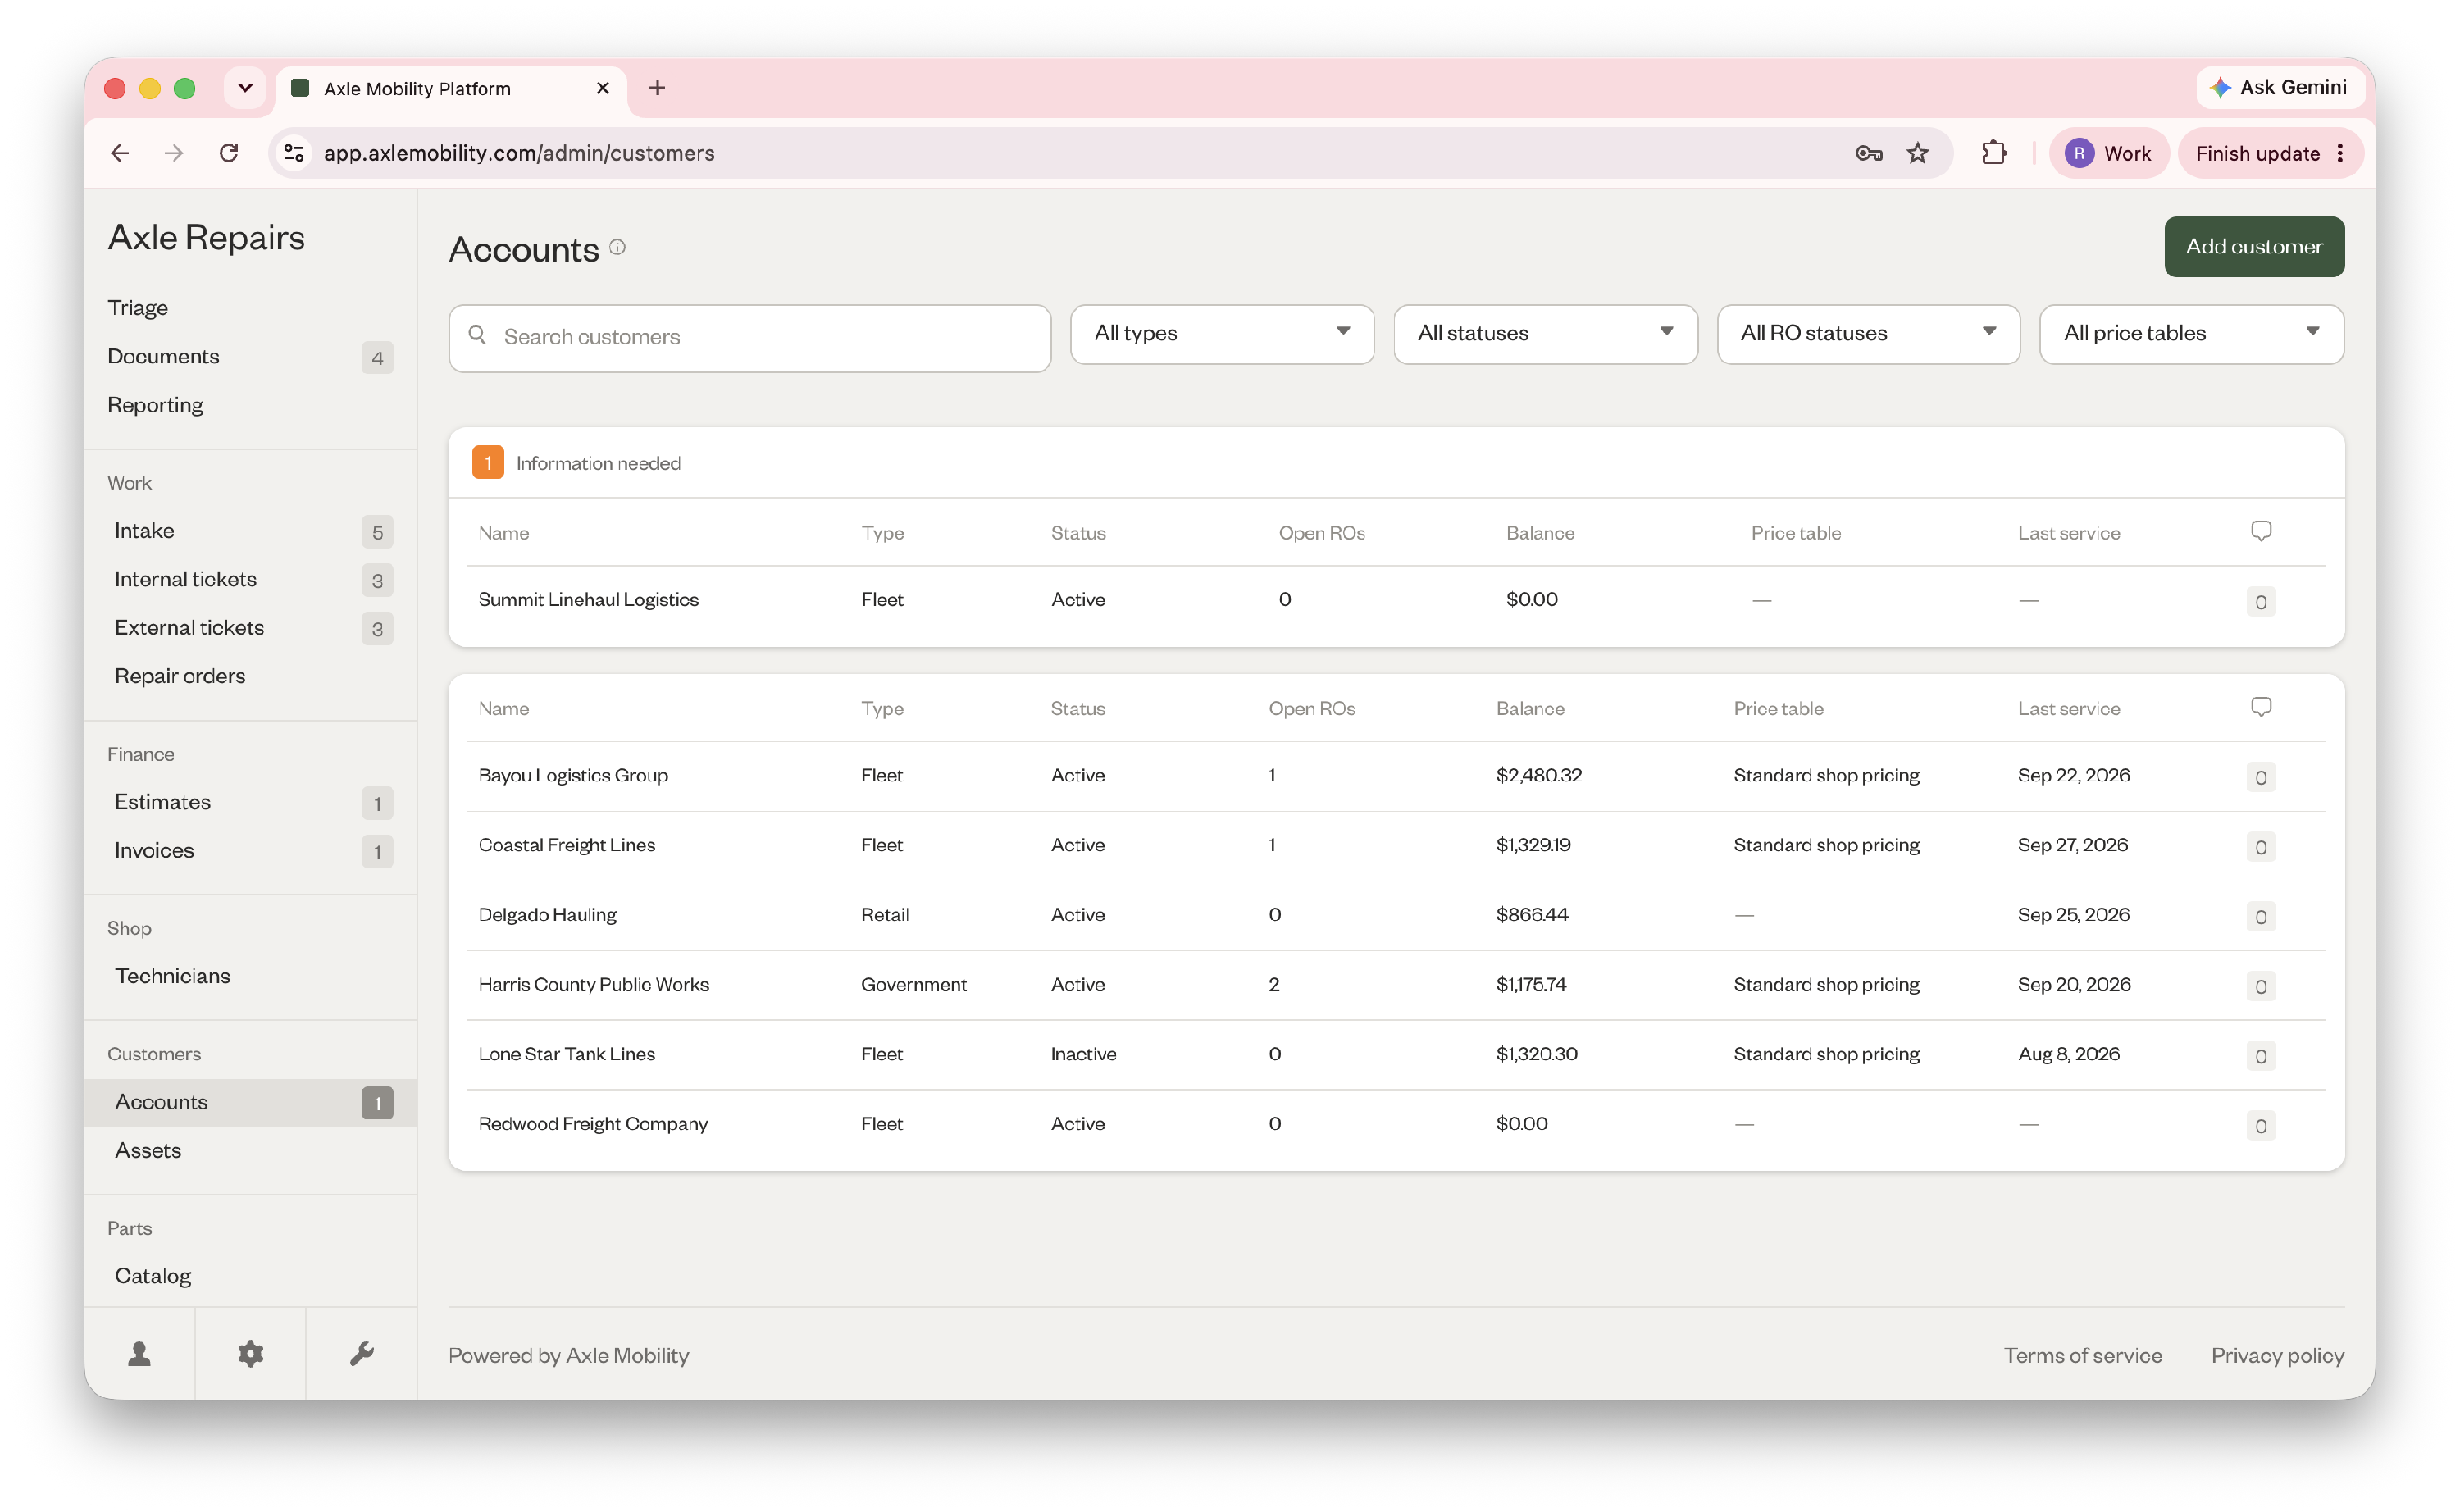
To attach an asset, follow the steps below!
Add your first real customer asset in Axle
- Go to Customers > Assets > "Add asset" in the top right corner. When you enter the VIN, the make, model, and year will be auto-populated.
- If applicable, add the asset ID, license plate, and nickname, and select which asset type and configuration it is.
- Then click "Add asset" to finish.
- Go back to Accounts and click on the customer in "Information needed".
- Go to the Vehicles tab in the drawer and search for the asset you just created to add it to this customer. An asset can belong only to one customer.
Once the asset is linked, the customer will move out of “Information needed,” and you’ll be ready to create their first repair.
3) Create and assign your first repair
Create a new work request
- Go to Work > Intake > "New work request" in the top right corner.
- Search for the customer's asset from your Assets list to select it.
- Select a state of the asset (safe, unsafe, grounded, or unknown), and then optionally, set a priority for the request.
- Select a type for the work request — for this repair, select "Unscheduled".
- Fill out the issue field below with a brief description, ie. "This truck has a broken marker light."
- Click "Create work request."
You can view this work request in Intake > To action tab.
Create an internal ticket and repair order for the request
- Open the work request you just created.
- Click "Approve" and "Create internal ticket".
- In the Activity tab, click on the internal ticket you just created labelled with a WT (work ticket) prefix.
- Assign a technician (this can be yourself) and optionally, schedule the repair order. Then, click "Create repair order".
You can view this repair order in Repair orders > Open tab.
4) Complete your first repair
Fill out the repair order in Pocket Tech
- In your sidebar, click on the wrench icon to open Pocket Tech, and find the repair order you were just assigned.
- Click "Add a new section" to fill out the repair notes, and optionally, add parts used, labor lines, or photos and videos.
- Click "Finish and review" to see a summary of the repair order, and then click "Submit repair order."
Close and invoice the repair order as an admin
- Go to Work > Repair orders and search for the repair order the tech submitted (by asset, tech name, or repair note).
- Review the repair details to ensure it looks good. You can request changes from the tech, or click the ellipses in the top right and "Edit repair order" to make any changes before closing it out.
- Click "Complete repair order" to run VMRS analysis on the repair order.
- Click "Close repair order" when it's ready to be invoiced.
- Click "Generate invoice" to create the invoice.
- Fill out the labor lines and parts used, and optionally, any fees, discounts, or taxes.
- Download the invoice as a PDF, send it to the customer, and click "Mark as sent".
- After the customer has paid the invoice, click "Mark as paid" to track it in Axle.
Continue from here
Add the rest of your sites, technicians, customers, and customer assets to start managing customer repairs on Axle.
If a customer repair needs to be done outside the shop, you can also create external tickets for work requests and dispatch them to another service provider (more in this guide).
If you have any questions, feel free to email support@axlemobility.com and we'll help you out the same day!